Apr 1, 2022 // projects
The foundation of an FPS game in Roblox
Devblog with insight into creating the foundation of an FPS framework in Roblox, from scratch, based on previous experience and pitfalls.
Important Edit
This post is a re-write of a previous devblog, which was written while the game was still in active development early 2022. Since then, progress had halted due to a lack of time and resources, and the game was eventually canceled.
Nonetheless, this post is a great overview of the development process and the key features, so I decided to port it from the old studio website. Some sentences have been edited to reflect the current state of the game, but most of the information is still relevant.
Quick history lesson
Originally CASHMINER began as a side-project in 2020. I spent a year learning LUA and Roblox Development by creating a game that would be a mesh of a casual FPS and a movement shooter. The idea was to create a game that would be easy to pick up and play, but hard to master, while also exploring unique gameplay mechanics.
Following that, summer 2021 was mostly spent testing the game with a small community of interested players and finally feeling close to an alpha release. But, there was a major flaw creeping up on me. The project carried the same codebase from around a year ago, when I had no idea what I was doing. This meant adding any sort of new features or even debugging was nearly impossible. This simply led to a buggy and unpolished experience that is the total opposite of what I was striving for.
The game was way outside it’s porting window, and deciding to completely re-create an already established project could be a huge mistake. However, it has been a blessing for me, as this time around I got apply everything I learned up to that point, which led me to learning and acquiring even more experience than if I had continued with the previous build.
First things first
Toolchain & Pipeline
Roblox games are usually edited entirely in Roblox Studio with the whole project saving to one “place” file locally. This is not optimal, since source control, editor plugins, documentation, build automation and much more is completely out of the question. However, there are some tools that allow you to work around this and create a proper development pipeline. Here is a list of the tools that were used at the time of writing this:
Over time some of these tools have been swapped for newer or better alternatives, but the core of the has remained the same. Today, in 2023, most of this toolchain and pipeline is pretty much mandatory for any serious Roblox developer.
Knitting
I was never a fan of huge frameworks. They usually make it very difficult to step out of the box and try something new, because they are opinionated by nature. However, after working with Knit by Sleitnick for over two years I can genuinely say it’s been an amazing experience.
Knit provides a very useful structure and many helpful modules you can call on a per-need basis instead of them being forced on you which means you can step out of its structure anytime you feel like it.
The two main components of Knit are Services and Controllers which split your code into Client and Server singletons which can be accessed, and their methods provide the relevant information based from where they’re called in the networking stack. Knit also provides numerous utilities for memory cleanup, creating custom events/signals and more…
The server backend
This is the part that is usually the most boring to talk about, well at least for me. But, it’s mandatory to have a good backend to build upon, so before I could start actually implementing the base of the game I had to get some basic services and controllers working.
- PlayerControl handles everything related to players and their objects, such as spawning in characters, loading player data, banning and kicking players, etc…
- Gamemode and Map are pretty self-explanatory, but these Services were created as a general API that can provide data to other services and the actual maps and game modes are implemented as components, that way implementing a new method of map generation or a game mode is a breeze.
Character Model
There are two competing teams in CASHMINER, yellow and green.
Roblox has avatars that are completely customizable and based on your account. This means any game you join would have your avatar. While this is great for social games, sadly it’s a major issue for an FPS game. Players need to be easily recognizable, the same size, have exact hitboxes, and I wanted them to fit into the universe of CASHMINER. My modelling skills at the time were not the best, but I’ve managed to create a simple character model that fits the game’s theme.
Note that in Roblox there are two built-in character types, the older 6 part(box) character and the newer 15 part character. While the 16 part type can make for better animations and more customizable characters, it wasn’t a good option in my case:
- Due to performance reasons when calculating hitboxes, the character needs to be as simple as possible and the 6 part character is the simplest
- Since the animations are not skeletal, it’s easier to make them look decent with fewer parts due to my weak animation skills at the time
- It fits better, especially with the viewmodel
Character Animations
I wanted the character animations to feel rigid and actually fit the characters. They are far from perfect, but they look cute enough for an alpha version. There are five key movement animation implemented: idle, walk, jump, fall and land.
By default, Roblox does not handle having the characters arms and head face where the client is looking, but this is pretty much mandatory in an FPS. Partly to achieve this the amazing Spring module by Quenty is used, which allows for smooth and nice feeling procedural animations on the character parts. The same module is used as well for recoil and viewmodel swaying as seen below.
This also allows for easy implementation of flashlights that are also facing wherever the player is.
Flashlights are an essential part of the CASHMINER gameplay, as even when you wouldn’t spot an enemy you would be able to easily identify them by their flashlight shining. This also lights the map up conveniently in the later stages of a round when most light sources have been destroyed.
Mom get the camera
Roblox has a single built-in camera you manipulate, which means I need a centralized way of knowing what the player’s perspective is set to and a way to set it when needed. Writing a camera wrapper was necessary to achieve this, however that was the easy part. The viewmodel is more complicated and requires a lot more work.
The viewmodel is your arms in first-person that hold your tool/weapon and the most important features are:
- Automatic creation and disposal based on state of character
- Positioning based on multiple factors, including the camera, offset and recoil
- Movement animations, both procedural and pre-made
- The ability to hold tools and play back their animations
As visible above, the viewmodel has animations for both jumping and landing, strafing from side to side and walking. Moving your camera results in the tool having springy action as if the arms are actually following your view. This results in a pretty satisfying first person experience.
The arsenal
Building upon the original concept of CASHMINER as an FPS, I’ve decided to split tools into four categories and three were planned to be customizable at release.
Weapon
Your primary way of dealing damage to enemies. The game had a huge variety of weapons planned. From classic bullet weapons to lasers, explosives, a flamethrower or flying kittens, because why not.
Destruction
The miner’s best friend that you can always rely on, the pickaxe. Destruction tools can destroy any part of the environment, as well as being the only tools that allow for mining resources/nodes which are usually the main objective of the game.
Utility
Utilities can be any sort of tool that allows you to gain the edge over the enemy team or support your team. Healing, making traps, expanding terrain, anything is possible with these tools.
Movement
Navigating caves is already hard as is, but navigating floating caves is insanely difficult. That’s why the grappling hook is there to save the day, more on the movement in general later.
Component based tools
Most FPS games, at least ones with similar guns across the board have a some sort of rigid configuration file that simply changes the parameters of how the weapon behaves. However, this is not an option in CASHMINER as tools are meant to fulfill many roles and playstyles.
Instead, I’ve created a component based system that allows for easy creation of a wide variety tools. When creating tools you can either use already existing components or create new ones to implement new behavior. Those same components can then be shared across tools, providing consistent behavior across the game.
Components are individually configurable and interchangeable, which means you can create a wide range of behavior. Even better, since the tools are objects themselves code can also be included inside the tool itself to create behavior specific to it by listening to various events available by the above components.
This benefits not only me as the developer, but also the players. The game is way more maintainable, way less prone to bugs and issues compared to the previous implementation. It’s also quicker to create news tools, and they have even more capabilities than before.
This allows tools to have many editable properties, such as but not limited to:
- 3D Model
- Animations
- Ammo and magazine and reload type
- Piercing and bouncing bullets
- Hitscan and projectile trajectory
- Damage (Range drop-off, headshot multiplier, limb multiplier, splash damage)
- Different types of particle and sound effects
- Character speed modifier
- Amount of projectiles/bullets per shot (shotguns, miniguns, etc…)
- Fire rate
- Recoil properties
- and much more…
Player input
Instead of going the standard route of switching your equipped tools using numbers or slots I created an optimized control scheme.
- Weapons are equipped by default and simply left clicking will fire the weapon
- Destruction tools are equipped and used by holding down your right click, and it will keep on firing/hitting until you release the same keybind, after which it switches back to your weapon
- Utility tools follow the same pattern as the pickaxe, but are bound to left shift
- Movement tools also follow the same pattern, but are bound to Q
- Pressing R will reload your weapon
This creates an ergonomic layout that’s based on what you will use the most. It also simplifies the complex nature of having multiple tools, making it such that each tool only uses one key.
Help the server
Roblox’s servers are far from powerful, so performance is key. The best way to conserve performance, is to not even do certain things on the server. The server is there to do the necessary data crunching, validation and networking. But, clients can be left to handle things such as a tool rendering, tracers, particles, map effects, etc…
To help with this I’ve created a Service/Controller combo which handles offloading replication of anything really, to the client or from one client to other clients after server verification. The only downside to the current implementation is that it can get rather complicated to track bugs and issues, because it breaks the default network replication in order to get it to be more performant.
Also, this has the cool benefit of letting clients chose their graphical fidelity, or disabling certain effects if they wish to improve their performance.
Damage
With the major improvements to Hitboxes there was also room for damage calculation improvements. Now direct hit(dropoff) damage is calculated per each limb and the final amount of damage on 7 variables:
- Minimum damage
- Maximum damage
- Maximum distance
- Dropoff start
- Dropoff end
- Head multiplier
- Limb multiplier
This allows for more granular control over the damage properties of all weapons, and it will make it way more important to hit the enemies’ torso or even better the head.
Recoil
One of the most important parts of how an FPS feels is the recoil. While I did not want the recoil to be over the top, I also didn’t want it to be non-existent.
It is calculated using multiple properties that are applied to each tool. There is a pre-determined recoil pattern that is repeated each consecutive shot unless the reset delay time has passed. Recoil recovery is also applied after a certain amount of time and the recovery amount can vary between tools. To make each shot less predictable a random amount of recoil is applied to each shot. Finally, to make the recoil feel more natural, a spring is applied to the camera.
For extra balancing purposes, to prevent certain weapons from being accurate at range, a randomized amount of spread can be applied to each shot.
Grappler
Previously the grappling hook was implemented straight into the character, however now it is a separate tool to allow for more movement options down the road.
Its new name is Grappler, and it has been given an actual tool model alongside improved functionality. Instead of instantly pulling you towards your target it now actually behaves like a projectile and takes time to reach its target. The motion has also been improved with the force being applied even if you are on ground, but this still depends on the angle and velocity among other things. After the grappling hook has been stopped for any reason your momentum will still be applied for a short period of time to allow for consecutive grappling hook movements.
Hit the boxes
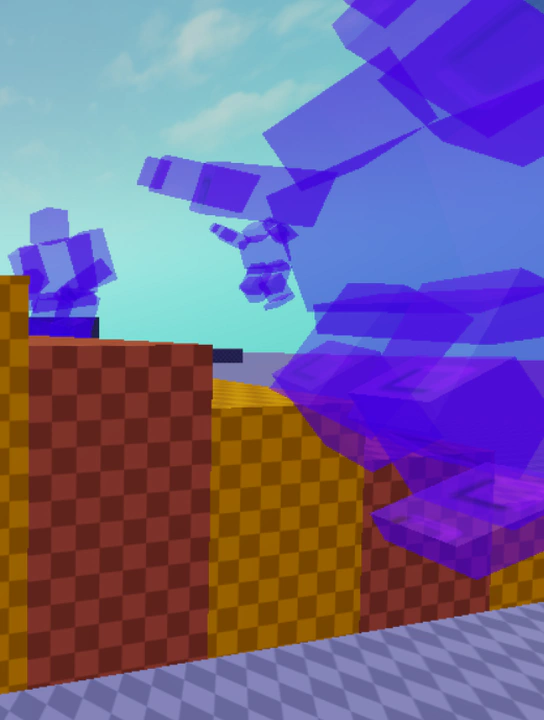
Ping/latency compensation and hitboxes are mandatory to have a good feeling FPS. The way this is achieved in CASHMINER is by saving the last second of character limb positions(hitboxes) at 20hz/fps. Then, overly simplified, the following happens once a player fires a tool:
- When a tool trajectory is fired bounding boxes are placed at every characters position reversed in time by your ping in milliseconds, these are simplified boxes to determine if you could’ve hit anyone at all.
- Once a bounding box is hit, hitboxes are created at the same position and the trajectory is recalculated to get an accurate hit(or miss) on your target.
- Even though the hitboxes are saved at 20hz this is compensated by finding the two closest saved positions in time and finding the middle point which most closely represents the moment at which you fired your weapon.
Keep in mind this is a very simplified explanation of how this works.
Also, compared to some other Roblox FPS games, hitboxes are actually separate for most body parts here, which means there are 6 hitboxes(arms, legs, torso and head) that are arranged for an accurate simulation of the players’ position in time.
Most importantly the main issue with Hitboxes in the previous version of the game has been fixed. Turns out a Roblox bug was what caused the issue after an update. To optimize the hitboxes, they needed to be cached in memory and not created/removed every time they were being used. This was achieved using the PartCache library by EtiTheSpirit. However, after the update if parts were moved too far from the world origin, they would no longer interact with raycasts. The solution for this was simply lowering the distance between the world origin and the caching position. You can find the fork on my GitHub or as a package on Wally.
Tool creation plugin
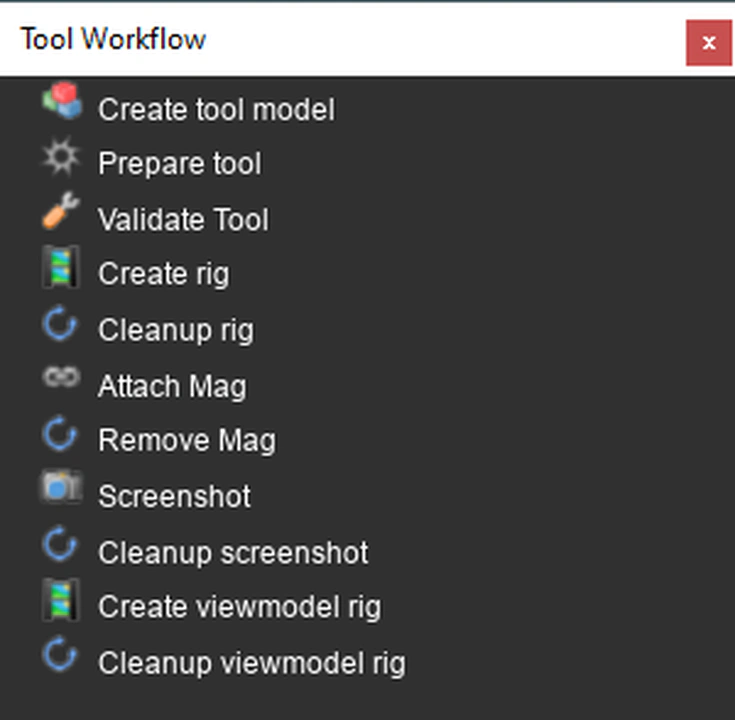
While Roblox has a built-in tool instance, 90% of its features are not useful to me. I’ve already got a custom character, custom animations and a viewmodel, so why not tools! However, for tools to remain consistent visually and to prevent issues with any missing attributes/properties I bodged together a Roblox Studio plugin that helps me with everything tool related.
It’s far from perfect, but it’s usable enough, it’s there simply to prevent me from making accidental mistakes when creating tools and to speed up my workflow.
Debug tools
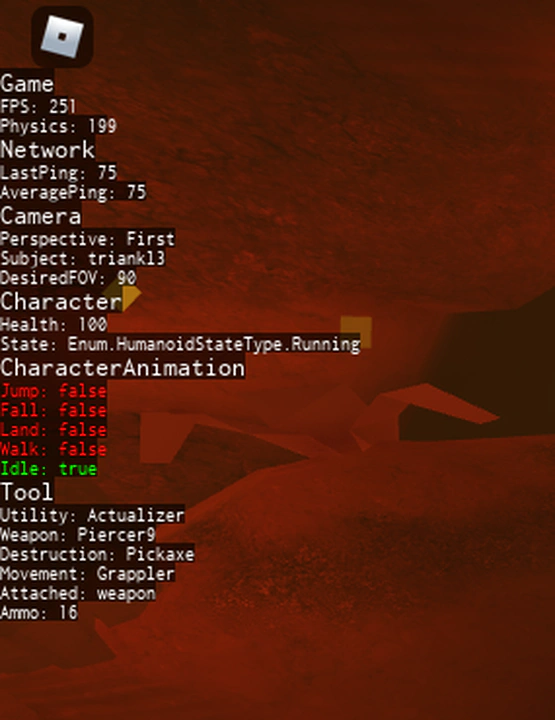
Being able to know what your code is doing and visualizing it or being able to execute debugging code/options is something mandatory. I built the Debug controller to do exactly that! It allows for visualization of anything using primitives and text. This makes visualizing the trajectory of a weapon effortless as well as seeing where the hitboxes are being calculated.
Just the surface
This is just the tip of the iceberg, but it’s already too long. It’s an overly simplified highlight of some the most important components I had to initially develop for the game. A lot of these systems and tools have been improved upon since then, and many more were added. This post is more technical in nature, and does not explain the game design decisions made.
Furthermore, certain elements that are very visible such as procedural generation are not explained here, but instead released as separate projects now. Take a look at Procedural cave generation.
The game was eventually discontinued, and I have abandoned development of personal projects on Roblox. You can read all about it in this blogpost: The end of an era.


